Instruments
Sampler
-
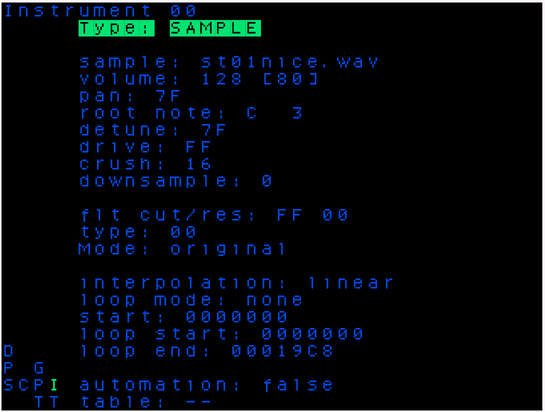
sample: selects the .wav file to associate with the instrument. you can select the same sample in more than one instrument. if you tap A,A here it will take you to the Sample Import Screen (which lets you load new .WAV into your project).
-
volume:
-
pan: pans the instrument left or right (0x7F is center)
-
root note
-
detune
-
drive: This is a volume modification before crush, and the instruments volume is after the crush.
-
crush: decrease bit resolution
-
downsample: decrease the bit rate, get those low frequency aliasing whines. each increase in this value will downsample the original sample by a factor of 2
-
cutoff: filter cutoff frequency
-
reso: filter resonance frequency
-
type: this is where it gets a little trickier. The filter now supports continuous change from low pass to high pass. set type to 00 for low pazz. FF for hi-pass and 7f for Band pass (or is it notch? n0s must check). all intermediate values morph in between them.
-
dist: filter distortion. for the moment we have none & scream. i'm planning on maybe add a third choice that would make the filter behave a little better when resonance is set very high in the old/default mode
-
interpolation: Interpolation mode ('linear'/'none'): selects which interpolation mode is used when in between samples. linear interpols linearly while none takes the nearest neighbor. Use none when playing samples at low range to add some typical overtones.
-
loop mode: selects the looping mode.
- none will play sample from zero to end.
- loop will start at zero and loop from loopstart to end.
- looper sync will automatically tune a loop so that it plays exactly 16 bars. Use the root note to play twice faster/slower
- oscillator is a special mode where the loop selection (from loopstart to end) is taken as oscillator data and automatically tuned. Experiment with different settings, do not forget 'root note' is your friend to tune the oscillator back in a useful range
-
start: start point of the sample regardless of if loop is enabled; in hex
-
loop Start: start point of the sample when loop is enabled; in hex
-
loop End: end point of the sample; in hex. You can play samples backwards by setting the end value lower than the start!
-
automation: If On, the table play arrows will advance one row every time the instrument is triggered, and execute only the commands on the new rows. If this is Off, table behavior is normal (play arrows cruise around real fast).
-
table: Select a table the instrument will always run. Clone a table here: RT+(B,A). Make a new table here: A,A.
Sample Import Screen
You can enter the sample import file browser by hitting EDIT EDIT (press the EDIT twice in quick succession) on the “sample:” field in the Instrument Screen.
All the samples that you may want to import into a project must be located in a folder named /samples at the top-level of the sdcard. You can either put your samples in that directory or in sub-directories of it, allowing you to have a way of sorting your samples library.
Note: sub-directories will be sorted before files, but otherwise the files will be listed in an unspecified order (ie. not necessarily alphabetical order).
For example:
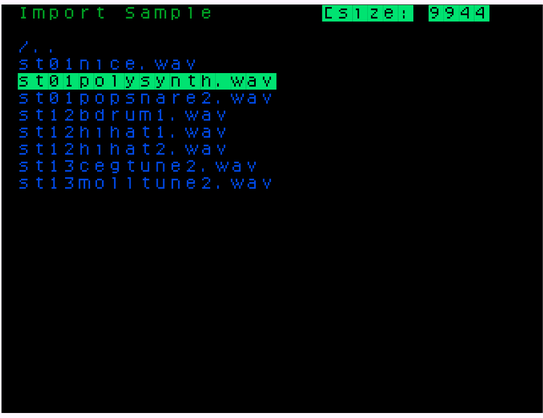
When entering the import file browser, the current folder is the library root folder /samples. All samples (.wav files) in that folder are listed.
Use the UP and DOWN arrow keys to navigate through the list of available sample files and subdirectories, subdirectories are indciated with a / prefix. Press EDIT to enter a subdirectory, you can go back to the parent directory by navigating to the /.. entery and pressing ENTER. Press PLAY to audition the currently selected sample wave file. To import the currently selected wave file press ALT+PLAY.
At any time, you can return to the instrument screen from the sample file browser by pressing NAV+LEFT.
Note: While there is no fixed limit for the number of sub-directory levels, there is a maximum of 256 files per directory. Also please note that while FAT formatted sdcards can support upto 256 characters per filename, picoTracker only supports upto 128 character file names and only with ASCII characters.
Supported sample file formats
MIDI
Midi Instrument Screen
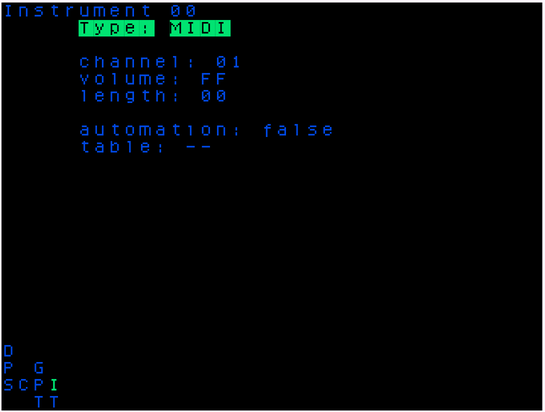
A MIDI instrument has the following settings:
- Channel - This can be set 0x80 to 0x8F which is midi channel 1-16 respectively
- Volume - The volume any NOTE ON will be sent to your device. FF=127, 00=00
- Length - Sets note gate length in number of ticks.
- Automation - On, the table play arrows will advance one row every time the instrument is triggered, and execute only the commands on the new rows. If this is Off, table behavior is normal (play arrows cruise around real fast).
- Table- As above, select a table the instrument will always run. Clone a table here:
NAV+EDIT ENTER. Make a new table here:EDIT EDIT
Synths
SID
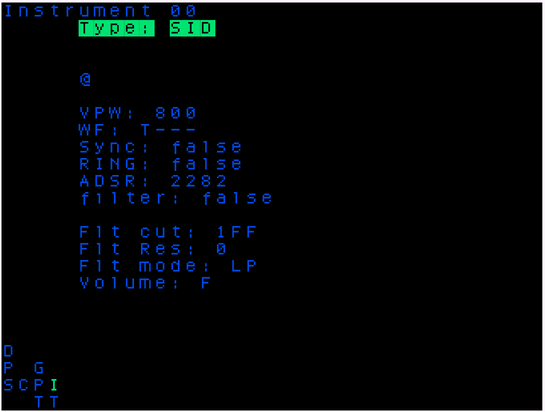
- VPW:
- WF:
- Sync:
- Ring:
- ADSR:
- filter:
- Flt cut:
- Flt res:
- Flt mode:
- volume:
OPAL
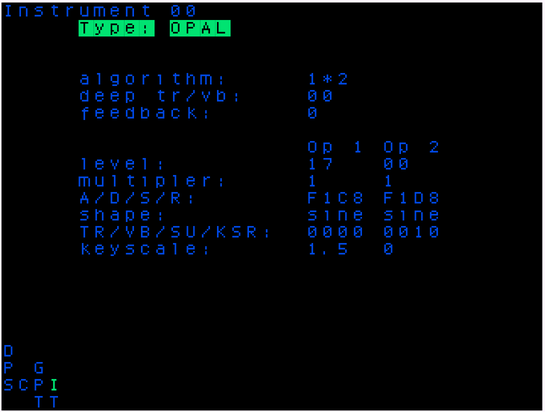
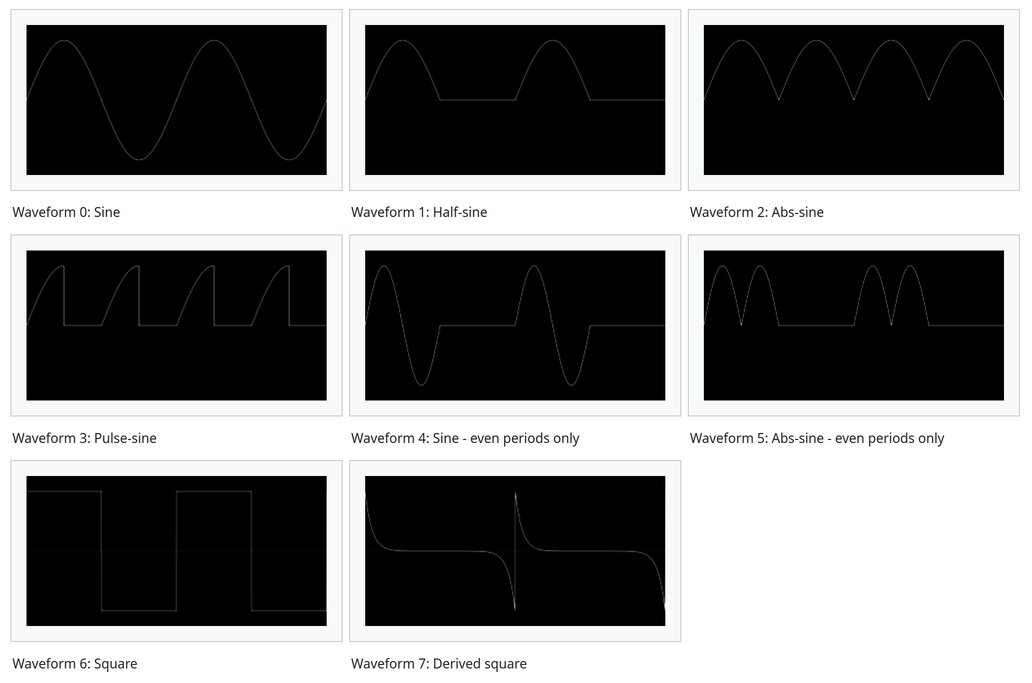
The OPAL instrument is an emulation of the FM synth "retro soundcards" of the PC DOS era. Each "OPAL" instrument is made up of 2 FM operators that can be in configured for either standard 2 OP FM or in parallel as 2 additive oscillators. Each operator can have one of 8 different waveforms as shown below.
The OPAL instrument has settings for both the instrument as a whole and per each of the 2 operators.
The picoTracker currently only supports up to 3 OPAL instruments. Because each of the instruments is a single monophonic voice, using the same instrument simultaneously in the picoTracker 8 track sequencer will work as if you were controlling an external monophonic synth via MIDI output and cause the following notes to cut off the previously playing note on that OPAL instrument.
Instrument wide settings
- Algorithm: Select either 2 Operator FM
(1*2)or Additive(1+2) - Deep tremelo/vibrato: Enable/disable Deep tremelo or vibrato effect
- Feedback: Turn on/off feedback for Operator 1
Per Operator settings
- Level: Operator output level attenuation, hence 0 is highest output level
- Multiplier: Frequency multiplier,
0=1/2, 1=1, 2=2, 3=3etc - A/D/S/R: Attack/Decay/Sustain/Release, each is single digit 0-15 value
- Shape: Waveform share, 8 to choose from, see waveform drawings below
- TR/VB/SU/KSR: Tremelo, Vibrato, Sustain and Envelope Scaling (KSR)
- Keyscale: Attenuates output level towards higher pitch:
1=3.0 dB/oct, 2=1.5 dB/oct, 3=6.0 dB/oct